Tuesday, April 19, 2011

Things That Make You Go #&)@*#$

I think you need to look at this picture first….

Can you spot what is wrong with this picture?

SaleCookies

This was at our local Shop&Save grocery store.  I saw this sign and just had to get a picture.  I mean really?  A sale that’s not really a sale?

Honestly, someone in their advertising department is a dolt.

Now if this were April Fool’s Day, I would understand the sign completely.  Maybe it has something to do with the “Sale” ending on 4/20.  Freshly baked indeed.

So, I didn’t buy any freshly baked cookies, simply out of protest for the non-sale sale.   I do admit that it gave me a good giggle though.


The thing that really made me want to say #*#&@# was when I went to the post office yesterday to mail out some packages.

It’s only 3 cents more an ounce

pennies That’s how much the postage was just increased to mail one pattern out.

To mail two patterns out in one envelope, it’s 6 cents. 

I don’t know about you, but most time, if I see a penny on the sidewalk, I don’t even bother to pick it up.  Pennies are almost worthless anymore.

But charge me 3cents more per pattern is a big ouchy because 3 cents adds up quickly when buying stamps.

See, not only does the postage cost me more, but I’m now going to be putting a stupid amount of stamps on the pattern mailing envelopes that go out.

I know that I can electronically print out postage, affix it to the envelope and actually save a little bit of $$ doing it too.  But, it’s impersonal to me.  I prefer to hand address and attach real stamps to my patterns going out in the mail.  It’s my own little personal touch.

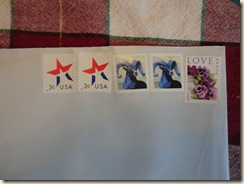
pansy stamp I like the .44 cent pansy stamp, so I always have a large supply of that one on hand.

I need more postage than .44 to mail out a pattern though so I buy a .17 cent stamp to sit beside it.  I’ve no choice on this  17cent stamp so it’s always the Blue Ram ….

blueRam

I know, I know, blue rams and pansies don’t go well together, but like I said, I’ve no choice. 

Until I run out of my current supply of stamps, this is how my envelopes will now look when I mail out two patterns…

CIMG0238*heavey sigh*  Tackiness indeed.  Sorry ladies, blame the USPS for this.

Although I do have to say that the guys who work at the Rochester, Pa post office are THE BEST!


Happy Day everyone!

Friday, April 15, 2011

Wait …. Child Labor Laws??! Nahhh …

First of all, let me say THANK YOU! to all who’ve ordered my newest pattern,”Tulips”.  They went out in the mail today.  Wool kits were even mailed out today, a day earlier than expected. 
I still have two full kits and two Tulip wool kits left, so if you’re interested just email me at cathspennies@gmail.com and I’ll send an invoice for payment and get it in the mail to you instantly!
The main reason why I was able to get everything ready for mailing today was because of the grandson. He helped me to get my work done.
The grandson comes to stay with me at least a couple days every week.  I know most grandparents would boast about their grandchildren and I admit to doing that too, but I do have to also admit that the kid is somewhat of a freak.  At 4 1/2  years old, he loves to clean.
When he comes to the house, the first thing he always asks is,
“Are we going to clean today?” 
He doesn’t say it in a dreary, bored, “do we have to?” kinda voice.  He says it with happiness and excitement.
I, being no dummy and also somewhat a hater of cleaning, naturally will find him something to clean while he’s here, since 1. HE WANTS TO DO IT!  and 2, IT NEEDS DONE!
Who cares about the child labor laws.  To him, it’s fun!
Jen told me that I need to stop working him so much because there will come a time that he gets sick of it and won’t ever want to help again.   I say phooey on that!
I’m going to take advantage of whatever he’s willing to do.
Soooo…. yesterday, he washed the dishes for me …
CIMG0189
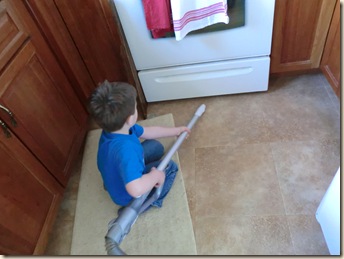
He vacuumed the kitchen floor for me ….
CIMG0174   (we had to change his shirt because the dishwashing became somewhat of a shirt washing too)
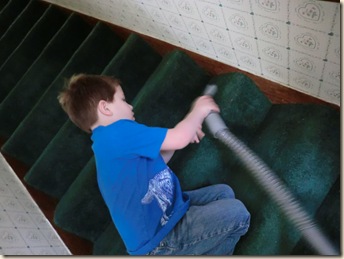
CIMG0175 Then he vacuumed the steps for me which is a HUGE help because it’s difficult to hold the vacuum and sweep at the same time.
He’s amazingly good at doing this too and each time he does it, he gets even better!
Then we went upstairs and he vacuumed the bathroom floor, sprayed and washed the floor behind the cabinets,  and cleaned two big mirrors. After that, he went all around the house gathering up the trash from all the waste baskets.
Finally, he helped me change the sheets on our bed and then make the bed.
CIMG0181 I always allow him to jump on the bed  (look at this amazing shot!)
We sing the “no more monkeys jumping on the bed” song until he gets tired of jumping.
So you see, we got a lot of work done and since he was worn out, he sat quietly watching tv while I finished packing patterns and addressing mailing envelopes. 
He wanted MORE work to do but I had run out of things …other than painting the back door, which I would have let him do if he had old clothes to wear.
I think if he lived here with us, our house would be spotless. 
If Jen & Jason would just have a few more kids, we could start a kid cleaning service. …. oh the possibilities!

Happy Day everyone and please don’t report me to Child Services!

Wednesday, April 13, 2011

“Tulips!” <-----Pattern is Ready!

After some computer printer glitches, the “Tulips!” pattern is ready to go!
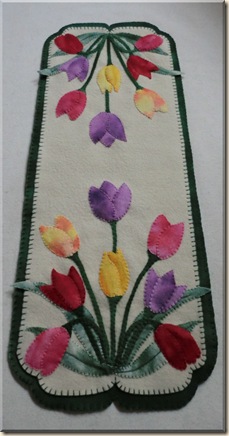
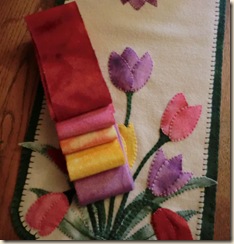
tulips cropped The finished size of this tablerunner is 10 1/4” x 29”.  The length can easily be adjusted to make this shorter or longer.  The 29” length gives a good 4” center candle/vase area. 
Along with the printed paper pattern, this design also has the special online pictured tutorial to go along with it.  Following the pictured tutorial each step of the way makes the stitching go a lot easier!
The tutorial can be found by clicking HERE
The pattern, for now, is $8.50 which includes shipping.  (US & Canada only. International customers will just pay any extra shipping cost)After next Sunday, the price will go up to the regular selling price of $9.50.  Just click on the Paypal buttom over there on the left sidebar under the “Tulips!” picture.
If you wish to pay by check instead of Paypal, just email me for my mailing info.  cathspennies@gmail.com
I also have wool kits available to go with this.
CIMG0236
The boldly mottled hand-dyed wool for the tulips is available for $10.00 plus shipping ...about $3.00 (US only).  This will make all your tulips look exactly like the tulips in the picture.
The entire wool kit will be $40.00 which includes the pattern and all the wool needed (It’s a LOT of wool … tulips, leaves, stems along with white and green backgrounds)  to make this.  (Prices are for this this date and if you read this two + years from now, naturally the shipping cost and wool prices will be slightly higher).  If interested in any of the wool, email me cathspennies@gmail.com.
Note:  the wool for the tulips is available now.  The larger wool kits will be ready for mailing on Saturday … had to order more green dye!

Happy Day everyone!

Thursday, April 7, 2011

TULIPS! Stitching Tutorial For Pattern

I just finished up my newest design “Tulips” and hope to have the pattern for this ready to sell on Monday. 

I hung it on my wall to take a picture and it looks so pretty, I think I’ll just keep it hanging there!
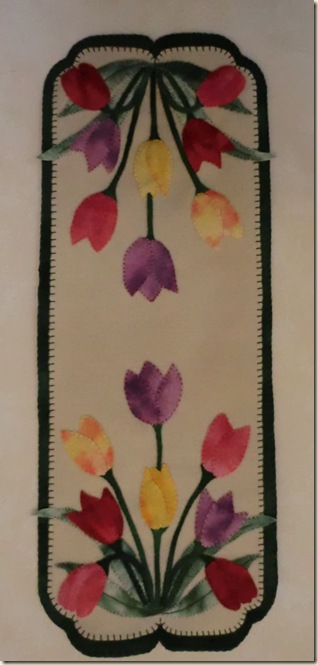
CIMG0206 This measures about 27” long which gives this a good 3” of center candle/vase space.  It can easily be made longer if you wish more space in the center.
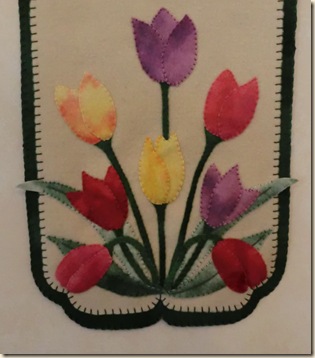
CIMG0207 I’m going to show ya’all how this is made, (almost) step-by-step.

All those stems and leaves in there might seem intimidating and difficult but once I show you the pictures, I really believe that even a beginner stitcher would be able to handle making this tablerunner.

That doesn’t mean that I’m giving you permission to make this without purchasing the pattern.  I know, I know, I make it really easy for people to steal from me but I really REALLY believe that it’s so helpful to those of you who want to make this, that I’m willing to risk the certain thievery that will go along with the tutorial.

Now, let’s first talk about the wools that I used for this. 

I will be selling the wool colors to go along with the pattern but if you have your own stash at home, here’s some help when choosing…

I did try using non-mottled wools for the tulips and they looked pretty but the mottled wools are what make these tulips really stand out.  So, to get the best, most vibrant looking tulips, look for boldly mottled colors. 
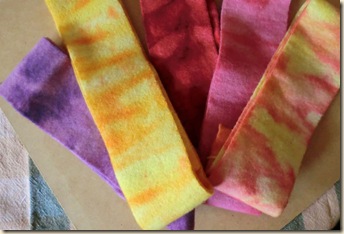
CIMG0208 And just because I used assorted colors for this doesn’t mean that YOU have to make it this way.  This would be pretty with all the same colored tulips or perhaps red and yellow tulips or … well, you get the idea! 

I used a dark green for the stems and a mottled green for the leaves.  I tried using the same dark green for the leaves, but the dark color just took too much away from the tulips.  Using a lighter green for the leaves made them blend into the background better.  The green that you use wouldn’t have to be mottled. Using any lighter green shade would work well, I think.

I used a matching green mottled background for this but I think any color that is used for the tulips would look pretty for the backing color.

Ok, Let’s get started!
CIMG0191

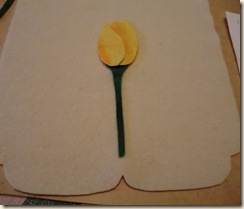
The pattern itself will give the instructions for cutting the background edge shape.  Once the background wool is cut and ready, the center tulip stem is pinned in place. 

This can be whipped stitched or if you prefer, a blanket stitch can be used too.  I personally like the look of the whip stitch on all of the applique, so that’s what I’ve used.

Once that center stem is in position, then place the two longer stems right beside the center stem….
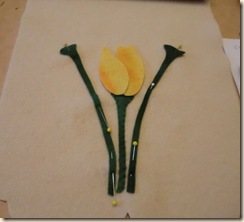
CIMG0194 They are arched slightly and if you want, you can measure to make sure that they are exactly equal but it’s easy enough to just eyeball it to get them placed equally centered.

Those stems can now be whip stitched in place.
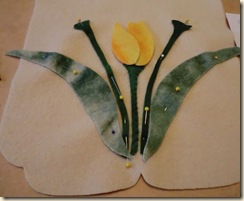
CIMG0195 The two leaves are placed right beside the stems.  I stem stitched right up the center of the leaves.  The pictures will show the leaves with just the stem stitch up the center. Later, I decided to whip stitch the edges of the leaves.  I recommend whip stitching the edges down now.

Once the leaves are in place ….
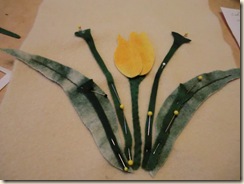
CIMG0196 The next set of stems are placed and pinned onto the leaves. Notice how these two stems have their top corner edges lined right up with the edge of the leaves. This makes it super easy to get the correct arch for the stems.

  See what I mean about it being easy?  When looking at the finished picture, it looks like it would take a tremendous amount of measuring to get them placed right.  But really, once the center stem is in place, everything else just goes right in perfectly.
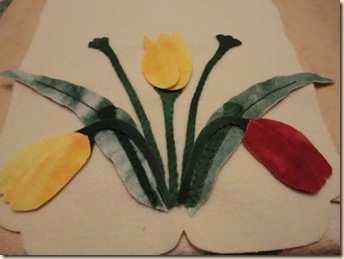
CIMG0197

Now the next two set of stems are placed.  They are placed right beside that center stem and overlap the other stems. 

Once all those stems are whip stitched in place ….
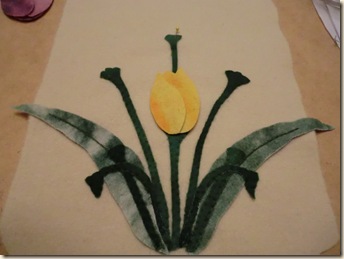
CIMG0198 I pinned the last stem right above the center tulip, tucking the bottom of the stem under the tulip.  That’s whip stitched in place. 

Now comes the really fun part!  The Tulips!

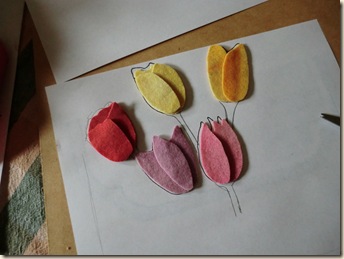
All the tulips except for the two bottom tulips, can now be whip stitched on … the pattern instructions will show the exact placement for each petal.
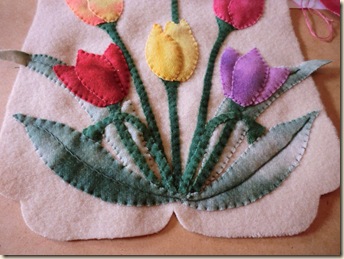
CIMG0204

Now I pin in place the bottom set of leaves.  These will cover up all those little stem ends.  I stem stitched up the center of the leaves and then whip stitched the edges.  

Now, just flip the wool to the other side and do these steps all over again!
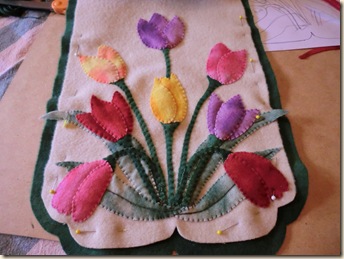
CIMG0205 The bottom two tulips are stitched on now and you can see, I’ve pinned the green backing onto the background. 

I blanket stitched around the white edge and also around the green edging.  I didn’t use a backing on the green back simply because it’s such a pretty mottled green, I hated to cover it up and because the mat is heavy enough with all the applique, that it lays really nicely without any additional weight.


That’s it!  Tulips made easy!


Watch for the new pattern for this as well as lots of pretty mottled wools , to be ready hopefully by Sunday or Monday


Happy Day everyone!  

Monday, April 4, 2011

Those Blasted Blessed TULIPS!

I’ve been wanting to make a Tulip Penny Rug for YEARS.  Yes, YEARS!

It’s just one of those things, like Roosters and Butterflies, that I know I will design and make eventually, but there is just never enough time and I put it off.

Our Tulips are starting to spring up around the house now so the other day I thought, “it’s now or never time”.  I should be working on summer designs … I MUST start working on summer designs but I’m going to get this Tulip picture out of my head and done with!


A lot of time consuming work goes into creating an original penny rug design.  Sometimes, it comes really easily … I know exactly how it needs to look and exactly what colors I want it to be.  I sketch it out, then I fine tune it to get it to fit exactly in the space that it needs to be in.

But sometimes, it’s just not quite as clear in my head what I want it to look like.  It’s that trial and error, time consuming work that makes me more determined than ever to complete it and get it right.

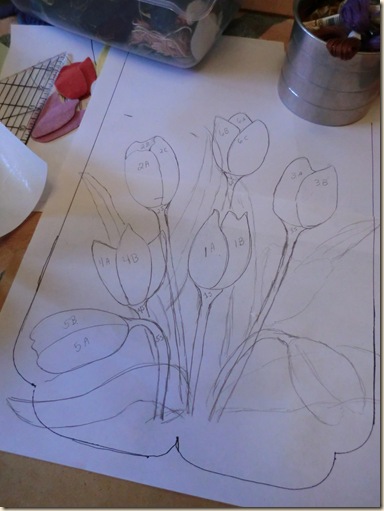
The Tulips have taken quite a considerable amount of time to design, because I never was much good at flower arranging.  I knew basically how I wanted it to look but sitting down and drawing it was really difficult for me.

I rough sketched it with just the tulip positioning.  It wasn’t quite what I wanted, but for now, until I had the wools dyed in the colors that I wanted, it would do.

So here’s the original version:

CIMG0190 When I design something, I always have to keep in mind how easy it will be to fit the design onto a standard size piece of paper so that it will easily convert to a paper pattern.  So I am limited somewhat with creating because of this.

But these tulips, although really pretty, just weren’t what I had pictured in my head.  I wanted BIG, SPLASHY and in your face kinda tulips.

So it was back to the drawing board AND back to the dye pots because these wool colors just weren’t splashy enough!

CIMG0201 With two standard sheets of paper taped together, this is the rough sketch of the design. THIS is more like what I had pictured in my head.

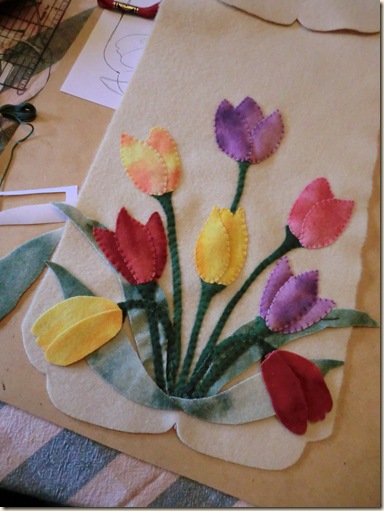
After I re-dyed all my wool colors, I was very pleased with the results and the wool snippets went flying everywhere as I cut out my tulip petals, leaves and stems.

CIMG0200 It’s not quite finished but I’m very pleased so far with the results. 
The instructions for the pattern on this will be a bear to write and the pattern layout guide that I always put in with my patterns will have to be oversized paper, but if I get a positive response, I’ll have the pattern ready to sell in a week or so. 

Let me know what you think!


Happy Day everyone!