Tuesday, December 28, 2010

Where The Heck Is That Barbie Hiding!?!


I remember growing up with a mother who would forget where she hid Christmas presents.  I can’t remember what the presents were, but I distinctly remember being puzzled by how in the world someone could forget something like that, especially in a small house which was occupied by 5 people.

To give myself a little credit, our house is much bigger than the house I grew up in.  Therefore, there are more hiding places available.

To my discredit though, the gift that is missing didn’t need to be hidden, because Rachel knew she was receiving it as a gift, just like she’s received it for the last 10 years.

I know I bought this several months ago ….

BARBIE

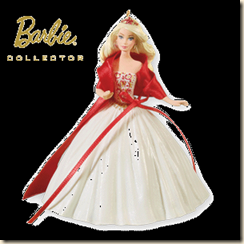
It’s the 2010 Hallmark Barbie Ornament.

Rachel has received the Hallmark Barbie Ornament every year since they first appeared 11 years ago.

I know she’s somewhere in this house.  I just don’t know where I put her after she arrived here.

I wouldn’t have hidden it anywhere.  I would have put it upstairs in our bedroom just to store it out of the way.  But. it’s. not. in. our. bedroom.

Oh, I’ve searched.  And then I searched more.  Then yesterday I cleaned and searched.  I found some missing socks, Jen’s old  swimsuit, Rachel’s favorite jeans that has a hole I needed to patch…about 3 years ago.  But Barbie is still missing.  I know for sure where Barbie is NOT hiding. 

To make it worse, I’m reading the new Stephen King book.  His books always give me creepy ideas in my head, long after I’ve finished reading the book.  I can imagine the hidden Barbie ornament … well, I won’t go into Stephen King details but basically, it involves rats and maggots and lots of bad smells and sinister noises.

I must find that missing Barbie before Stephen King does!

So I’m making myself crazy trying to figure where the heck I could have put that little ornament box.  The daughters are going to have a fine fun time making fun of me for this one.

I’m telling myself right now; I’m going to search for it a little more today and if it doesn’t turn up, I’m going online to order another one.

I know what’s going to happen when I order a new one though …

the missing one will turn up.

So if any of you happen to know where I put that missing Barbie ornament, please let me know.  I would appreciate some help!

In other Christmas news …

How could someone not want to receive a brand spanking new Apple IPad for a Christmas gift? 

That’s the big gifts that hubby and I gave our two daughters for Christmas.

One daughter was more excited than the other to receive it.  It was a huge surprise for both of them though.  Jen and Jason love it and Rachel, preferring her laptop, isn’t quite as thrilled with hers, but I’m sure once she uses it more, she’ll love it too.

If anyone out there reading this has an IPad, and knows of some good interesting Apps that you can’t live without, let me know. 

Rach found a police scanner App and the other night we learned that someone had a flat tire on the turnpike and somewhere close by, a 65 year old woman had a hematoma.  All of that fascinated her for some reason.

All in all, it was a really nice Christmas.  I’m glad it’s over though.  Once the tree and decorations are put away, things can get back to normal …well, at least as normal as it can be after reading a Stephen King book.


Happy Day everyone! …. and if anyone can tell me where that darned Barbie is in my house, I’ll love you forever!

Saturday, December 25, 2010

Putting on the Merry Christmas Present Face

So today is the day, finally!
Every year, all of us spend so much time preparing for this day.
The shopping, the cleaning, the decorating, the baking and cooking.
Just for one day.
But once that day comes, you’re more than glad that you did all of that preparation because it’s all of those family traditional things that we do that keeps the spirit alive.
It’s not even about the gifts. 
But I do have to say, having a little one around sure does make the day even better.  The grandson is at that perfect age .. he understands what’s going on and no matter what present he gets, he loves it.
This year, while waiting for the family to all gather at our house, I’m a bit worried though about the present that my husband and I are giving to our daughters and son-in-law.
It’s something that they’ve not asked for … I don’t think they would ever expect it from us.  That’s what makes it exciting …to see them open up their very special gift and then the surprised and joyous faces they make which will make all that work and effort and $$ worth every stinking bit.
But, there’s also a  chance that they won’t appreciate it, like I hope.
It’s then, when they open the gift, that I’ll see that “look”.
I know both of them well enough to know exactly what the “look” looks like.
It’s that look that I saw when one of them came home from work the other day holding their Christmas bonus.  It was a Spiral Cut Ham, with glaze.  She hates ham and I don’t think many single, 21 year olds  would appreciate a ham for a Christmas bonus. (I, however, was thrilled with it.)
I saw that look on both their faces, several years ago, when they opened their present of pajamas .
I thought the Pjs were wonderful, but they told me almost right away that they were old lady pjs. 
I hope, when they open their gifts today, I’ll see that look of joy and total shocked surprise on their faces.
And not the “Present Face”
 
Wishing you all a joyous Christmas with your loved ones … and absolutely NO “Present Faces”!

Tuesday, December 21, 2010

Our Driveway Is Brutal, Watch Out!

Ok, so last year, our mail carrier had an incident on our driveway that lead to her refusal to ever drive up our driveway ever again when there is any snow.  Mind you, she has a 4wheel drive vehicle and is known to drive too fast, but yet, she blames our driveway.  She got stuck in deep snow because she was gunning her engine on a plowed but a little icy driveway.

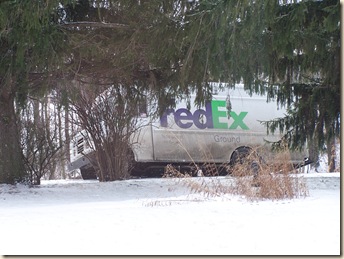
So, yesterday, we had a package delivery.  Now, why this guy decided to back down our driveway instead of turning around is really unknown, but our driveway was plowed and not icy and this happened:

100_4770 While backing away, the driver somehow managed to go completely off the driveway and got stuck at the top of the hill bank.  His back truck tires were literally teetering on the edge of one railroad tie.  Thankfully, the truck didn’t roll down the hill but if he had tried to spin his tires to get unstuck any more, he would have flipped over the side.

He was a super nice guy and I felt so bad because I know these drivers work hard during the holidays and any delays like this,  put him way off schedule.

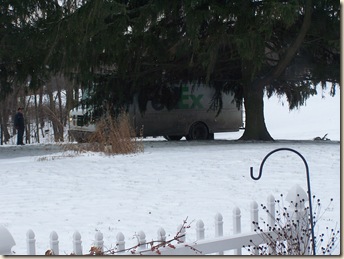
So he waited around for over an hour for the tow truck to arrive…

100_4773 They pulled him out, but not easily.

100_4772

Rachel, home for a little lunch break and I decided that if the truck flipped over the hill, we would go out and help by bringing all the packages up to the house.  Of course we’d need to open them all just to make sure nothing was broken or damaged.

100_4775 Once the truck was finally pulled out we discovered the real reason why the truck got stuck in the first place.

The driver obviously did not know how to drive his truck in reverse.

Even on a completely straight and flat section of the drive, the towtruck driver had to walk along with this guy to yell directions.

Without the towtruck driver there to help him, he would have gotten stuck several more times after knocking down big pine tree branches and running completely over my flower bed.

He’s safely on his way, and I’m glad that I have no more deliveries coming from this company any time soon.

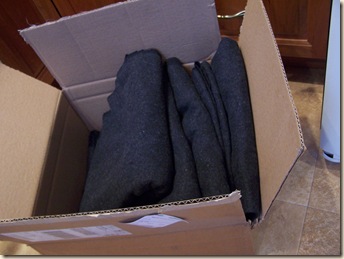
The good thing about all this is that he delivered some real goodies for me…

100_4778 Wool!   Lots of beautiful thick black tweedy wool!

I ordered this from my wool company a while back but it was on back order for a long time until they finally cancelled the order saying that it was going to be out of stock for too long.

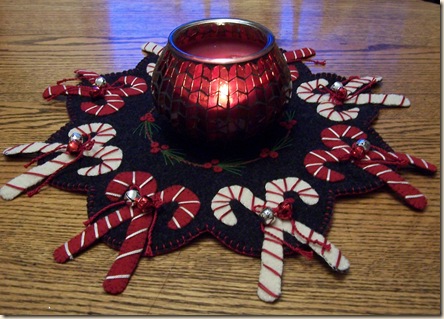
So I called the company.  This wool is gorgeous and I had used most of my supply to fill orders for the “Jingle Bell Candy Canes” candle mat kits.  I needed more of the amazing wool to use for myself.

They told me on the phone that all they had left was remnants.  To make a long story short, I got 5 huge pieces of wool at a discounted price with free delivery because they were so apologetic that they couldn’t fill my original order.

  Just an amazing deal!


I know y’all don’t want to hear this because everyone is right in the middle of the big Christmas hustle bustle rush, but I’m working on Valentine designs now.  I will have two really cute designs ready to sell as patterns within the next week or so.  Be sure to keep watch!


Happy Day!

Saturday, December 18, 2010

Stringing Popcorn For Da Tree

I just realized that I haven’t blogged for about a week! 
Gosh, where did the time go?!?
Honestly, I told myself this time last year that I would try to take it easy this year so that I would have more time to get things done to prepare for Christmas and then be able to relax a bit.  It’s not quite so bad this year but it’s still too much too close to Christmas.
I just finished up my last order last night ….
100_4765 And those jingle bells in the center represent the very last ones I have left so hopefully, I’ll be able to find them somewhere so I can stock up and have more available next year.  I know they’re hard to find at the craft stores now, but perhaps they’ll be discounted online after Christmas. 
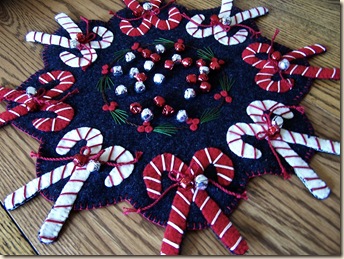
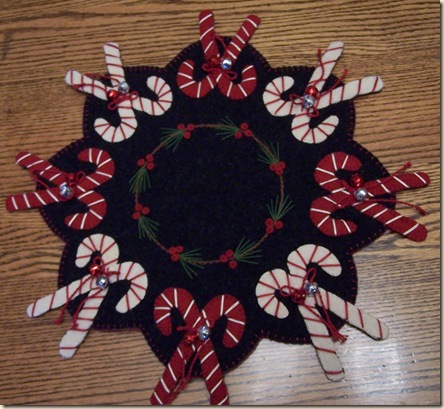
This pattern (the Jingle Bell Candy Cane candle mat)has been REALLY surprisingly popular.  I wish I had finished the design earlier so more of you could have had the time to finish it for the holidays, but… the good thing is that I have new designs all drawn out and ready to go for next Christmas so I’ll be able to sell them waaaay before the holidays next year.
So,  I’m done with orders now for finished candle mats and have time now to do the baking, cleaning and finish decorating the tree.
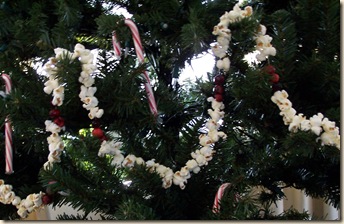
The grandson has been pestering me to finish the tree so that he can help to decorate it, but I have to put the popcorn strands on it first.  My fingers only had time to stitch thread on wool and no time to stitch popcorn on thread, so it had to wait.
I did get a start the other day …
100_4768 and it was just enough on the lower branches to allow him to put the candy canes on.   The silly boy ended up decorating the lower branches nicely with every single one of the candy canes.  The upper branches will be caneless this year, I guess.
So, this stringing popcorn has been a tradition for me for …
well, forever. 
We have 10 foot high ceilings so we used to always get huge trees.  The bigger the tree ,  the more popcorn. 
Nowadays, it’s a much smaller tree, so not quite as much popcorn stringing, but it’s still time consuming.  I don’t hate doing it, it’s just that I could be doing so many other things instead, so I put off doing it.  But really, it wouldn’t be our tree without the popcorn, so I HAVE to do it
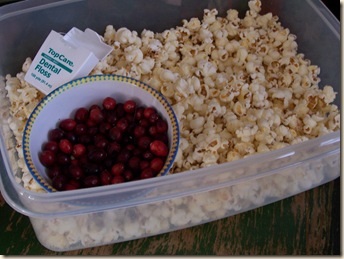
100_4769 I go through lots of popcorn.  So some tricks to get it done fast?
First of all, I always pop it on the stove, using Orville popcorn.
I don’t use microwave popcorn.  The Orville popcorn popped in a pan on the stove make large fluffy popcorn which is easier to string.
Secondly, I always use dental floss instead of thread to string the popcorn. I use the waxed mint cause I like the mint scent while I’m stringing. :)  With dental floss, you never have problems with the thread breaking … it never breaks.  Heck, we used to have a golden retriever that would hide behind the tree and crunch away at the popcorn.  The string never broke and she easily ate it without messing up the rest of the strand.  Sheesh, I miss that dog.  Best dog ever …
Anyway, that’s pretty much all the tricks for stringing.
I meant to post this a while ago but I forgot…
If you go to Amazon.com HERE they’re giving away FREE, one holiday song each day until Christmas.  There’s some really good music there that is absolutely free! 
I guess they do this every year, but this is the first year for me.  We’ll have to remember to watch for it next year.  Someone remind me, ok?

Ok, ladies.  I’m off to fight the crowds at the mall with hubby.  I really really hate doing any shopping this close to Christmas, but hubby will be with me to keep my crowd claustrophobia under control.

Oh, and I’m a bit disappointed that more of you haven’t advertised your Ebay and Etsy sites in my last blog post.  Thanks to those of you that did, but it’s not too late to give your website a little boost in sales.
Go down to my last post and let everyone know what you’re selling, give the link and wait for the big bucks to come in!
Ok, so maybe you won’t be bombarded with hits, but I’m trying!

Happy Day everyone ! …. I’m going to try to get through this shopping day without becoming frazzled! 

Saturday, December 11, 2010

Ebay, Etsy Selling! Let’s Do Some Shopping!

Do you sell your handmade goodies on Ebay or Etsy? 
Everyone should know what Ebay is by now, but oddly, there’s a lot of people who don’t know what Etsy is.
Etsy is almost like Ebay except it’s specifically for handmade/homemade/artist type items.
Etsy, at least for me, is a great place to go to be entertained.
Odd items can be found there that make you think, “Ummm…what the heck?” and “wow, someone actually bought that?”

Here’s a good example …. This ….
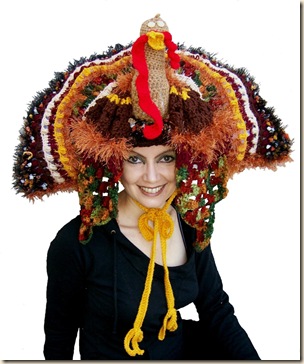
Aturkeyhat
Well, what can I say?  It’s self explanatory.  It was sold as a pattern on Etsy.  Someone out there owns a pattern to make this.
I really like how the tie strings have the turkey feet at the bottom.
We all probably know someone who would have the personality to be able to pull off wearing this in public.  
My sister would probably wear this at work.

Once you’re at the Etsy site, just use the search bar to find whatever you need.
I easily found this gem when I typed “earrings” into the search bar…..
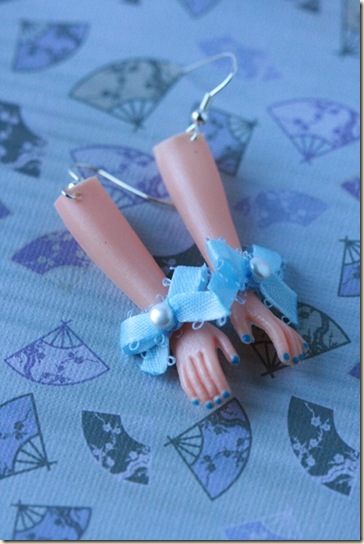
aarms I do believe that these are cut off Barbie arms that are made into earrings.    I wish, like the turkey hat, this seller would have shown how these actually look on the ears.  I think seeing them dangling from the ears would help to sell them better.
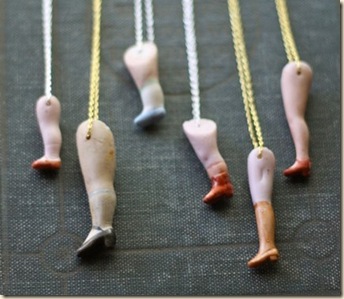
So to go along with the earrings, I accidently found this when I typed “shoes” in the search bar…..
alegs My sister would probably wear both the arm earrings and the leg necklace to work too.  Carol, don’t look at this, it’s supposed to be a surprise Christmas gift.

But really, Ebay and Etsy are great places to shop for really beautiful handmade things.  So many bloggers are Ebay and/or Etsy sellers, just like me, so I’m going to give all of you a chance to advertise your things in the comments.
I can’t personally list all of your names … I don’t want to hurt feelings if I forget a name.
I will name the bad sellers though …. ….
nah, I won’t publicly name you, so calm down.  Those of you who wish to know the ones to stay away from, just email me for the names.  :)
So, in the comments, give me a link to either your Ebay/Etsy selling site or give me a link to one of your favorite sellers whom you really admire for their quality items.
Ok?  Let’s do some Christmas shopping!
Happy Day everyone and have a grand weekend!

Wednesday, December 8, 2010

The Returning Dish Dilemma

First all of, thanks to all of you who’ve ordered my newest pattern, “Jingle Bell Candy Canes”.  Patterns are mailed now and kit orders will be mailed out today.  I only have 2 more wool kits available for this so if you’re interested, let me know, QUICK.
cathspennies@gmail.com

So I have this little, minor, insignificant, reoccurring problem with this little dish …
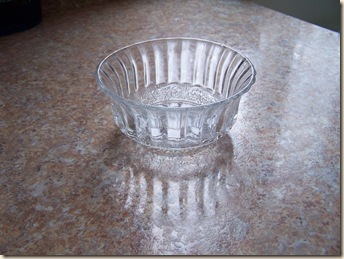
100_4741 I don’t own this dish but it never fails to show up at my house when I invite the relatives over for the holidays.  I don’t have a problem with it showing up at my house, but I do have a problem with it STAYING at my house until I remember to return it to it’s owner.
I won’t mention the name of the owner of this dish.  And I do want to mention that anytime this dish comes into my house, it contains something yummy.  I think.  She brought this over, filled with something for our Thanksgiving meal. This time, I’ve no clue what she had in it.   All I know is that it’s now here, sitting empty on my counter, waiting for me to return it.
But see, she always, ALWAYS leaves it here.  I always ALWAYS, try to get everyone to take their dishes home with them when they bring food over for the holiday meals.  I wash them up and made sure that all empty dishes are placed in their hands as they walk out the door to head for their homes.  This way, I don’t have to look at it sitting on my countertop until I remember to deliver it/return it to them.
This little dish always finds a way to remain here.
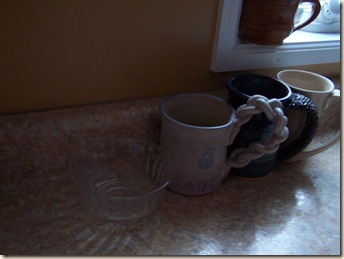
So each and every time, I wash it and sit it at the back of my counter … like this…..
100_4742 And here it remains until I remember to put in in my car and take it over to my sister’s (whoops, I can’t mention a name) the un-named person’s place of work. Sometimes months go by with it sitting, unused on my counter.
It’s really a cute little dish.  Each time I look at it sitting there, taking up precious counter space, I’m tempted to put it up in my cupboard and pretend that it’s mine.  But then, every time I use it, I’ll remember that it’s not mine.
So now, in my mind, I’m scheduling in a delivery date. 
Friday, I will be in the town where her office is located. Hopefully, I’ll remember to put it in the car with me when I leave.
Until then though, I’m so weary of always seeing it sitting here empty, so darn it, I’m going to use it.
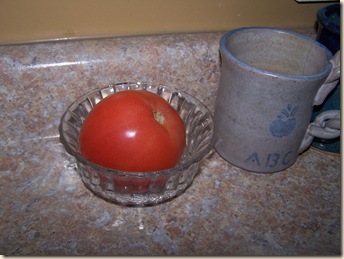
100_4749 Well, it’s a bit too small to use to hold my tomatoes …..
100_4744 I always have a pack of gum and some tic tacs sitting on my counter so maybe this could be nice holder for them … nah…..
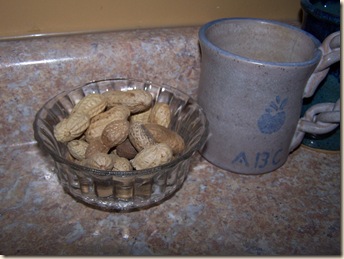
100_4748 Peanuts fit nicely in it!  Maybe.  But this reminds me to ask my daughter about her son’s peanut eating ability because yesterday when the grandson was here, I saw him help himself to a peanut.  I gave him a napkin to put the shells on, but later when I looked … there were no empty shells in sight which leads me to believe that perhaps he ate the shells????
Ok, I’m not going to let the peanuts sit out in a dish until I know for sure that he is not eating the shells.
hahah…. looking about for something else that I can put in the dish, I found this ….
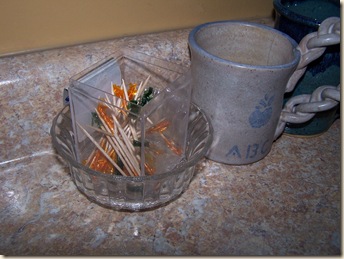
100_4747 Those fancy hors d'oeuvres toothpicks have also been sitting at the back of my counter … for a couple years.  LOL …. I just realized that this is something else my sister (whoops) that un-named person brought over and forgot to take back home with her. 
She’s getting these back, dust included, when I return the dish.
Do you think that after she reads this, she’ll feel shame for always forgetting this dish which forces me to always try to remember to deliver it back to her???
Are you kidding?  You don’t know my sister.  My sister will sneak into my house someday when I’m not home and deliberately LEAVE the empty dish on my counter.  In fact, I’m thinking that by next week, I’m going to see this dish magically appear on my countertop again.
Whoops, I’m not going to mention any names nor am I going to give the un-named person any ideas.
Maybe this Christmas I’ll see this dish back in my house filled with the un-named person’s famous cheeseball!  (hint, hint)

Happy Day everyone!

Monday, December 6, 2010

New Pattern = Ready!

Jingle Bell Candy Canes is being printed today so orders are welcome!
100_4714a Special preorder price is $8.50 which includes shipping cost (for US and Canada only)
Just click the Paypal button over there on the left sidebar to purchase.
If you wish to pay by check, email me and I’ll send you my mailing address.
cathspennies@gmail.com
Finished size of this candle mat is 16 1/2”. The center circle candle area measures 5 1/2" so there's plenty of room for a nice 4" candle for the center.

If you plan to make this right away, get to Michaels or Joann Fabrics now to buy the jingle bells.  They are getting low in their supply.  Look for either the 10mm or 12 mm size.  I’m pretty sure the ones that I’ve used are 12mm size.

Wool kits are available but won’t be mailed until Thursday.
I have absolutely gorgeous thick black tweedy type wool to use for the background on this.  It really makes the candy canes stand out.
Kit price, which includes all the 100% wool, the pattern and shipping is $36.00.  (doesn’t include the jingle bells or the threads)
If interested in the kit, just email me at cathspennies@gmail.com
I’ve made this pattern exceptionally easy.  The candy cane shape which extends over the edge is right in the background pattern.  No measuring is needed to get those candy cane groupings straight, centered and in line. Just match the red or white wool canes to the background shape and stitch.
100_4721 Basic stitches that are used are:  Blanket stitch, straight stitch, french knots and stem stitch. 

Happy Day everyone!

Friday, December 3, 2010

Jingle Bells Candy Canes Candle Mat!

I’m all ready to start selling some of my finished things. 

Perhaps next week, I’ll sell a few things on Ebay but

for now, I’m selling my things on my “Kindred Sisters” website.

100_4694a Since I did get so many requests for the pattern for this, I’ll try to work on that over this weekend.  

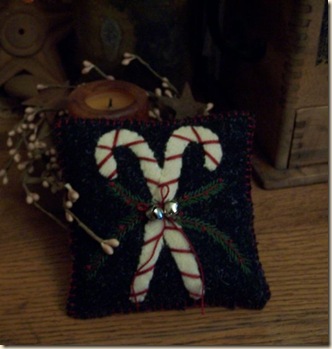
Y’all might remember that last year I sold little candy cane pillows …

100_3130 which is where I got the idea for the candle mat from.  The little pillow will be for sale on my Kindred Sisters website too.

I have to tell you ladies, if you’re stuffing little pillows like this one, try clipping up some of your old wool scraps to use for the filling instead of poly fiberfill.  The wool scraps really make a huge difference in the weight of it.  If you haven’t discovered it, give it a try.

Anyway, go over to my Kindred Sisters site and take a look at my finished things for sale.  Everything is made with 100% wool.  You all should know by now that I don’t use woolfelt for anything .. not that there’s anything wrong with woolfelt, it’s just that I love the look, the feel and the textures of 100% wool.

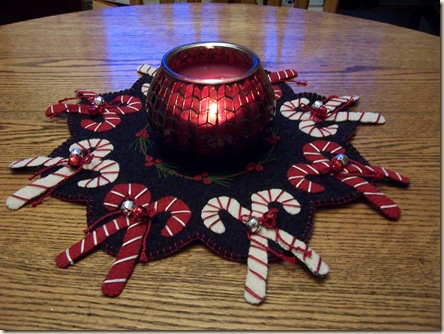
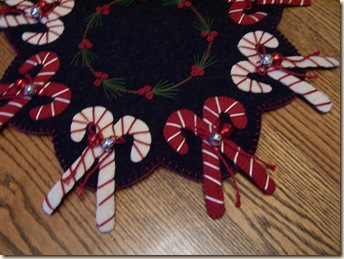
Here’s a few more pics of the Jingle Bells Candy Cane candle mat:

100_4714 100_4703


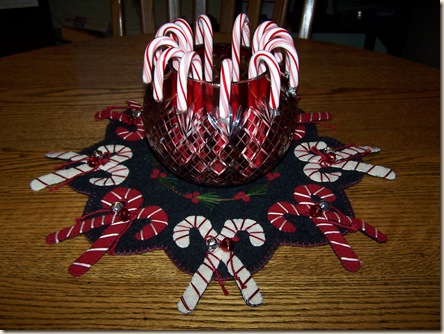
I have to laugh at the picture below that I took because no matter how I angled the camera to get the shot …..

100_4718

the screen on my camera made this vase filled with candy canes look like one of those shrimp cocktail servers that you get in restaurants.

Actually, looking at this little picture makes me hungry for shrimp cocktail.

But really, I think if I had more candy canes in the vase, I’d get a much better picture. 

Here’s the larger picture…..

100_4718 so please just imagine the vase with more candy canes in and and stop thinking about shrimp cocktails.

Or….. hmmm …. now you know that anything … even a shrimp cocktail server would look great on this candle mat!

Anyway… go over to the Kindred Sisters website and take a look at my things for sale. <-----click there to go directly to my site. 

Browse about the entire site <---- click there to see more gift ideas from some really wonderfully talented crafters! 


Thank you to EVERYONE who offered me help and suggestions for my obnoxious greedy squirrel problem!  You ladies are wonderful!

Happy Day everyone!

Wednesday, December 1, 2010

The Squirrels Are Winning The War


Before I talk about my battle with the local squirrels, I have to show what I’m currently working on.
100_4684 I’ve finally finished this (almost)  I just need to put the backing on.
This will be sold as a finished candle mat.  Once it’s finished, I show better pics.

Ok…
Let me first say, I like squirrels.  Really I do.  I brake for squirrels.  I’m saddened when I see the breeze blowing a fluffy tail of a flattened one on the road.  I marvel at their abilities to jump from tree to tree and to run across power lines. 
I don’t mind that the squirrels are helping themselves to the birdseed in the birdfeeders.  I DO mind though when they become selfish and greedy.
I have two bird feeders at the back of the house on tall poles.  The squirrels that use those feeders are mannerly and respectful when it comes to sharing the birdseed.  They do climb up the poles to get on top of the feeders but they don’t scatter the seeds too much and they always leave enough behind for the birds.
The one feeder that I have at the front of the house, by the driveway?
Nasty, mean, obnoxiously selfish squirrels come in and overtake the feeder.
They climb to the top of the feeder, knock all the contents to the ground and then wait for me to fill it up, only to knock it all out again.
The ground is covered with spilled sunflower seeds and cracked corn but the squirrels prefer the fresh stuff up in the feeders.  They’re too good to eat off the ground.
It’s a constant battle. 
The grandson even knows now to open the front door and yell at the squirrels when he sees them on the feeder.
100_4680 See, the problem is that the feeder isn’t attached to a pole.  It swings from a cord so it’s easy for the squirrels to tip it over, knocking all the seed to the ground. 
Some say to get a different type of feeder.  I don’t want to.  This feeder was a Christmas gift 2 years ago from Rachel’s boyfriend.  He picked it out just for me and even included birdseed with it. 
I’ve attempted different ways to keep them off the feeder.  I ended up sticking all of my garden/lawn decorations into the ground, surrounding the pole so that the squirrels wouldn’t be able to climb the main pole to get up.
100_4682 I thought it was a really good idea at the time.
However, as you can see in the picture, and as my husband laughingly informed me when he saw my elaborate efforts … I essentially just created a wonderful jungle gym for the squirrels.
100_4681 Great, a squirrel Disney World with free food. 
Hubby said he could try greasing the pole.  I think this is a whole lot of fruitless effort. 
I think I’ll have to mount the feeder on a board so that it doesn’t swing.
They’ll still be able to climb but they won’t be able to knock all the seeds out. 
100_4686
And here’s one of the squirrels right now as I type…getting ready to play on the jungle gym and then feast on the sunflower seeds and cracked corn in the feeder.
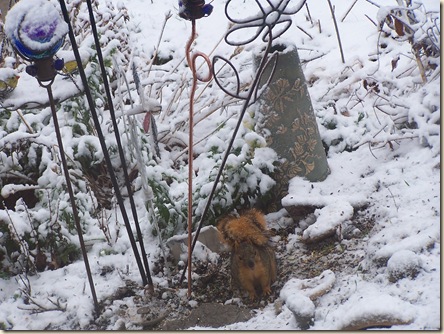
Yes, it is snowing here this morning!

Happy Day everyone!

Monday, November 29, 2010

Let’s Play Catch Up Today!


I haven’t blogged for a while and I feel soooo behind.  Not even sure where to start to catch y’all up on things. The bronchitis really whipped me this time.  It’s been almost 3 weeks now and I still don’t have my voice back completely…I’ve been croaking for so long now that I’m almost used to the sound.

Thank you all for the wonderful response for my newest pattern, “SNOW”.  Those who have ordered it should either have it now or it will be delivered shortly.

I have been working on some things to sell as finished items, so watch in the next few days for the pictures.

I haven’t had this happen for a long time, but it’s one of those things that every handstitcher has probably done from time to time….

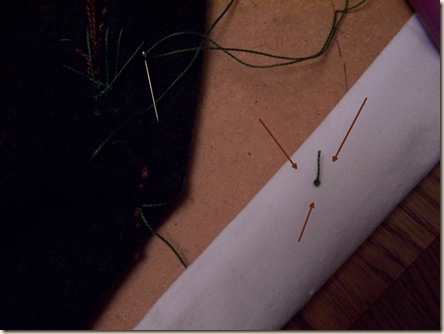
100_4678 See where the arrows are pointing?  Yes, indeed, I stitched my candle mat to my tablecloth.  It was the starting stitch too. 

Gosh, how many times over the years have I stitched myself to either a tablecloth or my own shirt … I won’t count!

Shame on me.  I always work on a wooden board to keep from doing this but the tablecloth slipped up over the board, I guess.  Thankfully it was only one stitch!

~~~~~~~~~~~~~~~~~~~~~~~~~~~~~~~~~~~~~~~

Ok, let’s talk about blogging and the blog world for a bit.

I have 315 followers now.  I would love to reciprocate and add all of you so that I can follow you too but blogspot makes that so difficult.

I wish Blogspot would send me a notice to let me know that someone has been added.  I also wish that Blogspot would make it simpler for me to find that new person’s blog so that I may add myself to their list.

So… here’s what I’d love for y’all to do for me.  If you’re following me and I’m not “following” you and you’d like me to follow you, please send me and email and tell me your blogsite address. 

My email address is cathspennies@gmail.com

Speaking of addresses, there are times that some of you comment and I’d love to respond back to you privately but your blog settings prevent me from getting your email address.

So, every one of you who have a blog, please, release your email address so that when I receive the comment in my email, I can respond right back to you.

To change the email settings,

** In your dashboard, click "Edit Profile" next to your profile photo.
** Under Privacy, check “show my email address”.
** Scroll down to identity and below username you'll see “email address”. Type in your gmail  address.
** Scroll down and click "Save Profile" at the bottom to save your changes.

~~~~~~~~~~~~~~~~~~~~~~~~~~~~~~~~~~~~~~~~~

I’ve been asked about the red dot tire prank that I did on our friends, Ben and Linda.

If you wish to read about the red dot tire prank just click here

Benny and Linda never figured out how those red dots got on their tires until one Sunday afternoon when hubby and I were traveling with them to go out for dinner, the subject came up.

Linda said something about still not knowing how the dots got on their tires and she looked over at me and saw the look on my face.  I guess  my face told her that I knew something about it because then she started laughing hysterically and said “you probably did it, didn’t you?”

I couldn’t cover up my laughing after that and hubby did nothing to help me, so I was caught!

So they know about it now and Benny promises to get me back.  He said that he already knows what he’s going to do but he has to wait for time to pass so that I’ll forget.  


Ok, that’s all for now.  I promise to keep up on the blogging this week to give you addicts something to read.  Honestly, some of you are such nags!!  :)


Happy Day everyone!

Saturday, November 20, 2010

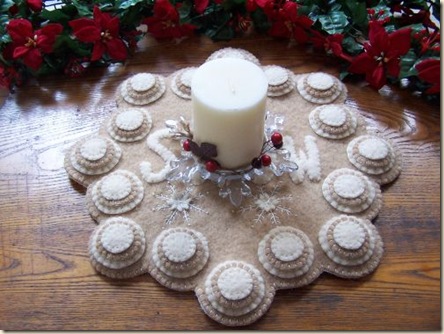
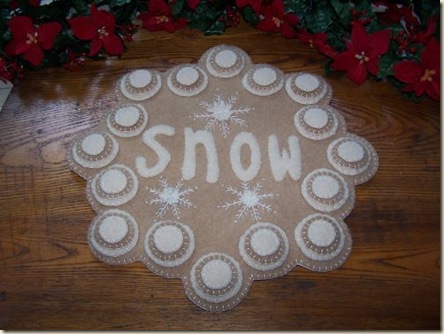
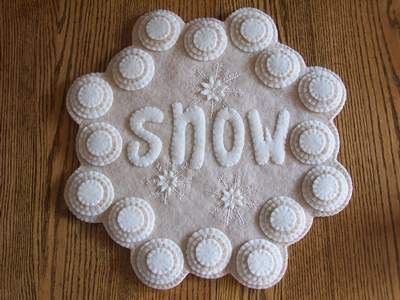
“SNOW” Penny Rug Candle Mat (NEW PATTERN)

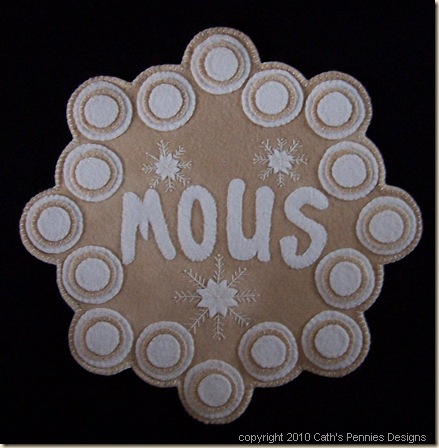
My husband informed me this morning that I spelled “MOUSE” wrong…

mouse I guess I need to add an “E” to the pattern for those of you who wish to make a “MOUSE” penny rug instead of a “SNOW” penny rug.

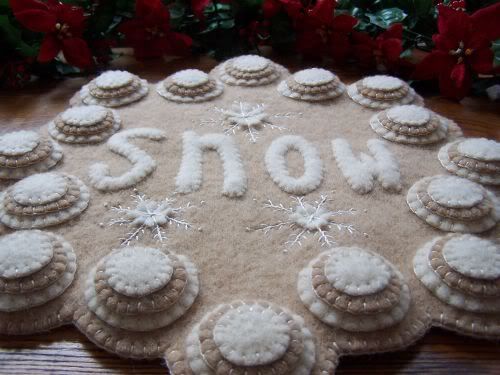
Personally, I prefer the Snow design….

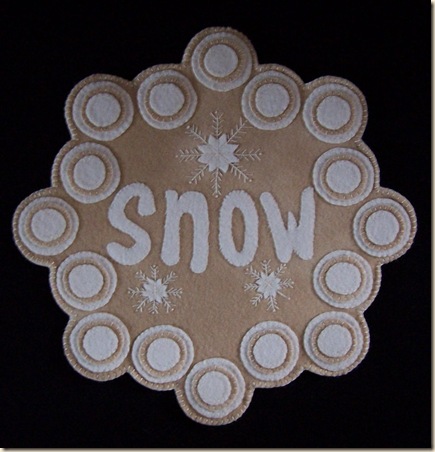
The pattern to create this is now available for sale!

The finished size is 15” across.  It’s shown made with 100% wool, which is recommended but this can be made with wool felt too if you wish to save on expense.

It looks especially nice when made with extra thick wools, creating a super puffy snowball effect….

But it still looks very pretty with the regular weight wool too.

Pattern price will be, like always, a special preorder price, of $8.00.

This special price will be good until Monday evening and then it will become the regular pattern price of $9.50.

This price includes shipping cost for those in the US and in Canada.

All other internationals, will just have to pay the additional shipping cost. (which is usually only about $1.00 more)

Simply click on the Paypal button over there on the left to purchase.

If you wish to pay by check, just email me at

cathspennies@gmail.com to get my mailing information.

Also, the “Christmas Sugar Cookies” pattern price will be going back up soon to the regular price of $9.50, so if you like it, purchase it now and save some $$.


The “SNOW” penny rug pattern will be ready for mailing on Monday!


Happy Weekend everyone!

Friday, November 19, 2010

“SNOW” Penny Rug –Tutorial (Part 2)

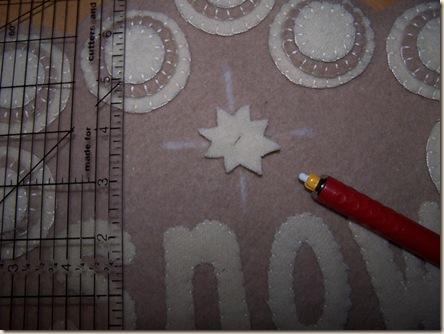
I’m going to finish this up today by creating the snowflakes.

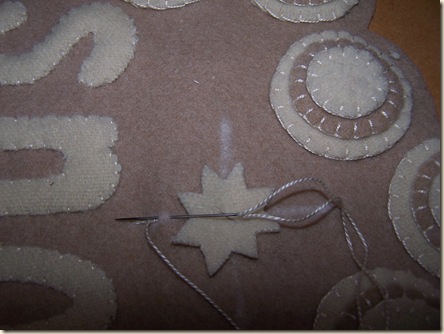
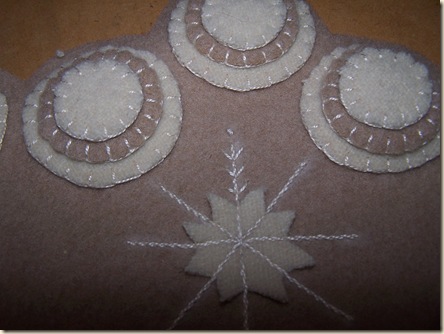
100_4658 The snowflake centers are cut out by using freezer paper also.  Even though they are small and you might think you can easily cut them by just drawing the lines, the freezer paper holds the wool tight so that each of those little tips and corners are cut perfectly.  Just be careful when removing the freezer paper so that it doesn’t shred the wool tips.

Ok, so in this picture, from the backside, I pinned the snowflake center.

Then I measured and drew the lines with a chalk pencil. (the measurements will be given in the pattern instructions.)

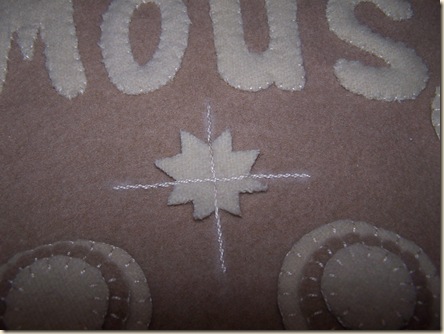
100_4660 Following the drawn chalk line, I did a stem stitch all the way across, catching the snowflake center in with the stitching.

100_4662 See how I’ve crisscrossed the stem stitch? 

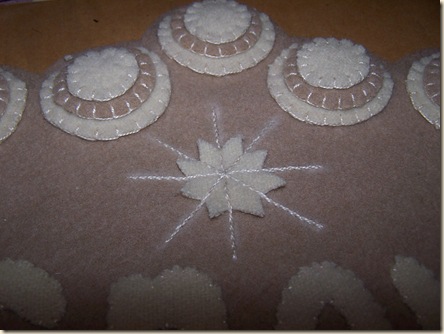
100_4664 I drew in the other lines and stem stitched. 

I have to note that I like how the stem stitch looks on the snowflake but if you’re not comfortable doing a stem stitch then a simple back stitch would work nicely too.  They are your snowflakes … create them how you wish! 

100_4666

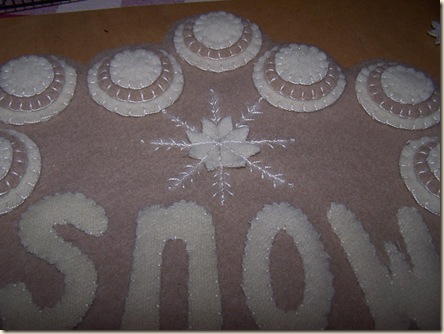
To give the snowflakes more detail, I’ve made little straight stitches and then added a little french knot on the top.

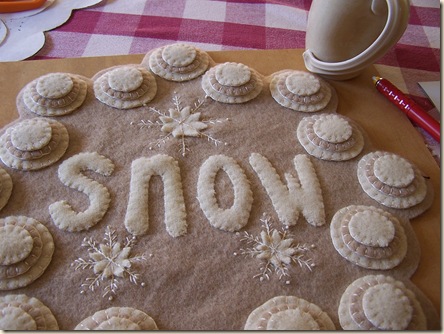
100_4668 Here’s the finished snowflake.  I just need to do two more smaller ones underneath the “Snow” letters and I’ll be finished with the top.

100_4671 Finished!  Now I’ll take this to the ironing board.  See how the background isn’t laying flat?  It’s a bit puckered so steaming it with an iron will take those puckers right out. 

For this design, I’m not going to let the iron touch the wool at all.  I’ll just hold the steaming iron over the design and let the steam do the work.  The background puckers go flat almost right away.

After it’s steamed, I can attach the backing.

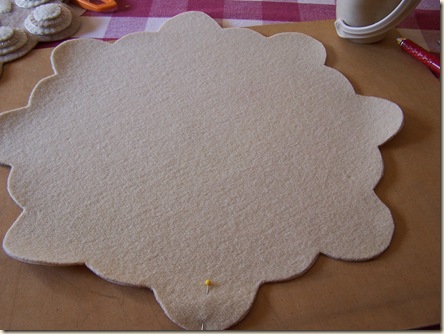
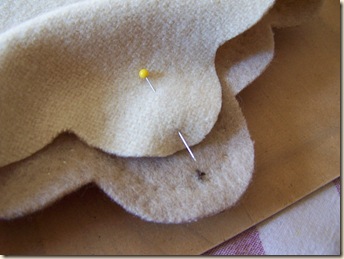
100_4674 I reused the same freezer paper from the background so that the shape will be exactly the same.  The pin that you see on the one scallop is there to indicate where my matching point is.

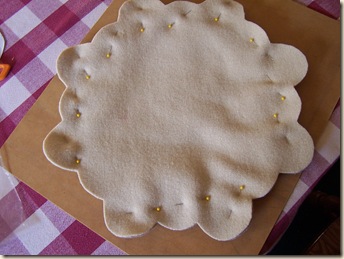
100_4675 I’ll match up the front background and the backing scallop together and then I’ll pin the rest of the backing on.

100_4676 It fits perfectly this way.  I am really generous with the pins so that no shifting occurs when I blanket stitch the edges.

All I need to do is flip it over and blanket stitch around the outside edge.

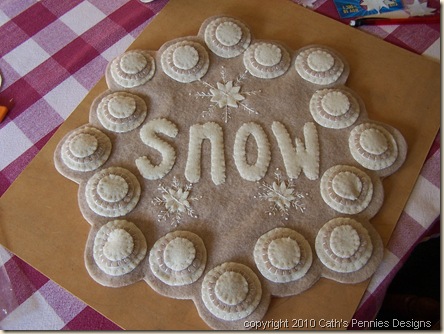
100_4677 Here’s the almost finished front!  Unfortunately I can’t show this with the blanket stitching on the outside edges because I ran out of my pearle cotton thread.  I should get more in today so I will be able to show the completed rug tomorrow.

You can see, this isn’t very difficult to make.  I used extra thick coat weight wool for this one but regular weight wool looks really nice too.

If some of you were readers last year, I showed one made with regular weight wool …..

100_3384aa Here’s the one that I made last year using the regular weight wool.  It’s just as nice, just not as puffy.

I’ll be taking orders for the pattern tomorrow, so keep watch!


Happy day everyone

Thursday, November 18, 2010

“SNOW” Penny Rug - a Step-by-Step Tutorial (Part 1)

If you scroll down a bit and look on the left sidebar, you’ll see a picture of this “Snow” Penny Rug …
000_1035
I’ve had that picture up for so long, most times I forget it’s even there …
until someone emails me to ask to purchase the pattern.
000_1027
It’s never been available as a pattern, until now!
Yes, I’ll be releasing this pattern for sale on Saturday (hopefully).
While it’s being printed, let’s do a pictured tutorial that will show you exactly how it’s made. 
It’s really not difficult at all. 
Please remember though, purchase the pattern if you wish to make this yourself.  This is a copyrighted design created by me, Cath’s Pennies Designs.
.. this tutorial is shown so that:
1. those who have never attempted a wool penny rug will see how easy they are to make.
2. those who have purchased the pattern will have additional pictured help in case the pattern instructions are not clear.
~~~~~~~~~~~~~~~~~~~~~~~~~~~~~~~~~~~~~~~~~
Ok, let’s get started!
I HIGHLY recommend using freezer paper to create the background shape and the penny circles.
We are using 100% wool and wool tends to stretch a bit when cutting.
The freezer paper will ensure that the wool stays in place while cutting, giving you an as close to perfect shape as possible without using a die cutter. 
I always recommend using 100% wool, but if you wish to save on cost, woolfelt may be used for this too.
(I know virtually nothing about woolfelt but it might not be a good idea to use freezer paper in this case because the ironing would/might flatten the bumpy texture that makes the felted woolfelt so nice.)100_4652
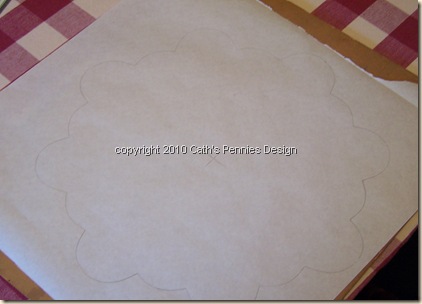
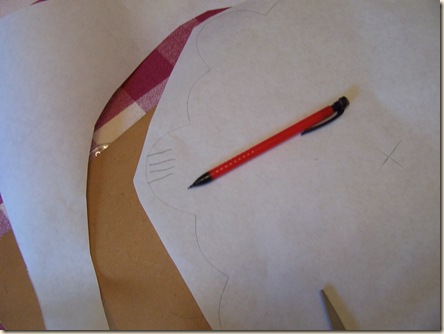
It might be difficult to see in the picture but using a pencil, I’ve traced the background shape onto the freezer paper.
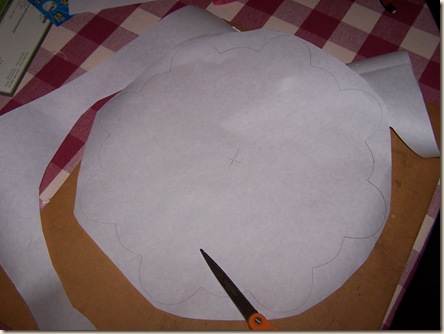
100_4654
I cut the excess paper away from the shape and now I’ll take this and my wool to the ironing board …
Oh, but I almost forgot! …
100_4656 TIP:  There will be a wool backing for this penny rug and I always use the same freezer paper for the backing.  Sometimes the shape is not cut perfectly so …  To make it easier to line up the backing to the front background wool, I pencil some lines on one of the scallops on the freezer paper.  Then I make a stitch with some contrasting thread in the wool where those lines are so that when it comes time to stitch on the backing, I line the markings together so that the background and backing will fit and align perfectly. 
Gosh, I hope that’s not confusing, but if it is, you’ll see once you go through this tutorial.
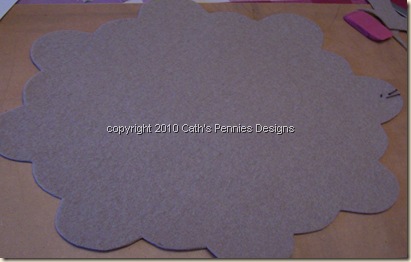
100_4625 Ok, with a dry iron, I ironed the freezer paper onto the background wool.  I cut along the penciled lines to create this shape.
I carefully pulled off the freezer paper and set it aside  … I’ll use it again later for the backing.
You can see on the far right that I made a little stitch in the wool so that when it comes time to attach the backing, I’ll know exactly how to line the two together so that they match perfectly.
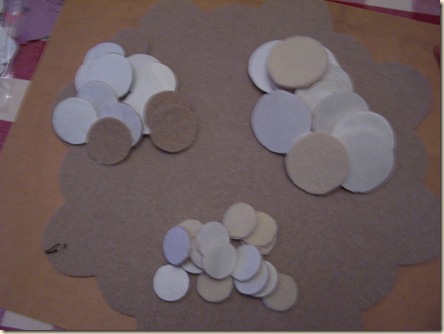
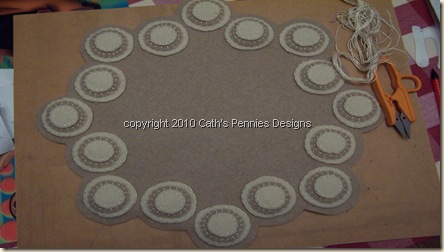
100_4626 The background shape is ready to go so I did exactly the same thing with the freezer paper to create the circles.  There are 16 stacks of 3 penny circles so the cutting takes some time.  If you have a circle die cutter, now is the time to use it!
I prefer to cut them by hand … I like the look of the not so perfect circles.
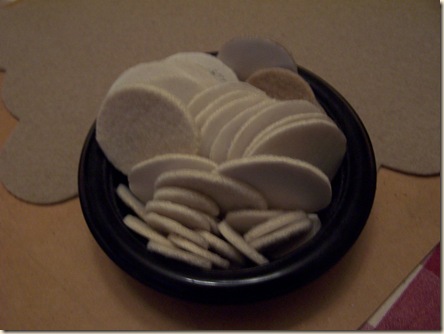
100_4628 I highly recommend putting all of the circles in some type of container so that they’re not lost.  It’s amazing how they disappear only to show up after you’ve cut the replacement ones!  Containing them helps (but still doesn’t guarantee) so that they won’t get lost.
Ok, time for stitching now!
100_4631
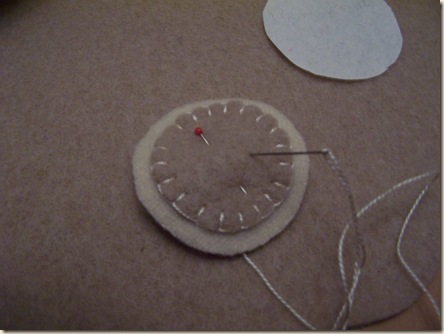
I need to stitch the penny circles together first so I’ll stack the medium sized penny on to the largest penny and blanket stitch around the edges, pinning to hold it in place.
With such a small circle to stitch, you might be tempted to not bother to pin.  I’ve found that pinning ensures that it doesn’t slip out of place, so that you don’t get a lopsided penny.
100_4634
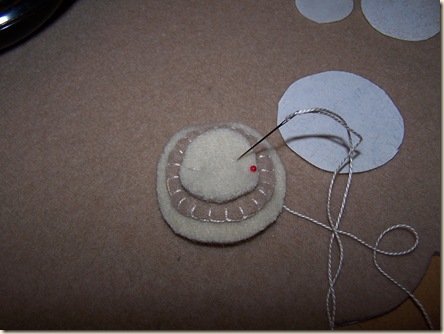
Now I’ve pinned the smallest penny onto the stack and blanket stitched the edges. 
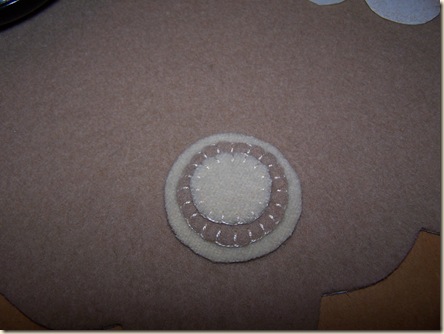
100_4636 One penny stack done, 15 more to go!
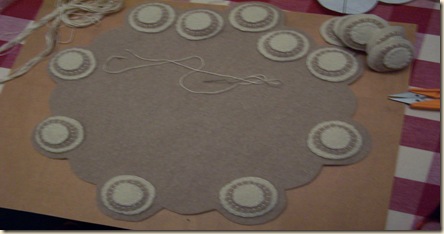
100_4637 The pennies are now ready to be stitched to the background wool.  I stitched the 8 outside pennies on first just to get the spacing right. Once those 8 are blanket stitched on, I filled in with the 8 inside circles.
100_4643 All the pennies are stitched and done!  
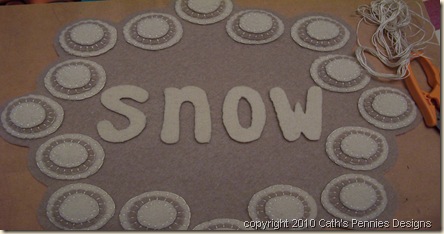
Now we’ll stitch on the SNOW letters.
100_4644 Again, I used freezer paper so that the letters are cut perfectly …or as perfectly as they can be cut without a die cutter.
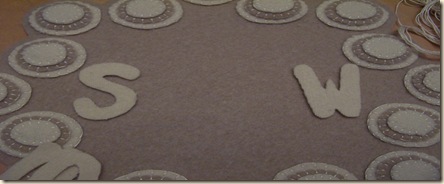
I stitched the “S” and “W” on first to make it easier to space the other letters evenly between.   I just did a whip stitch for the letters.  I like how it looks with a whip stitch.. it makes the letters look puffier … but if you prefer, a blanket stitch can be used instead.
100_4645
Ok, not too much more to go!
I’ll show the finishing tomorrow.  I need to stitch on the snowflakes and attach the backing.

Go Here for PART 2 of the Tutorial!  PART 2

Pattern should be ready to purchase on Saturday!
Happy Day everyone!